A well-placed video can turn a slide into a moment: suddenly a concept moves, a voice guides attention, and an idea becomes unmistakably clear. Embedding video in PowerPoint is the bridge between static presentation and dynamic storytelling, letting you keep media and slides together so your message plays smoothly and reliably.
In this article you’ll learn practical ways to add video to your presentation-whether it’s a small clip saved on your computer or a streaming file from the web-along with tips on formats, playback settings, and common compatibility pitfalls. Expect clear, step-by-step guidance plus simple troubleshooting and best practices for file size, resolution, and slide timing, aimed at helping your visuals support, not distract from, your narrative.
Whether you’re preparing a classroom lecture, a sales pitch, or a keynote, embedding video correctly ensures your audience sees exactly what you intend, exactly when you intend it. Let’s turn those static slides into an engaging, multimedia experience.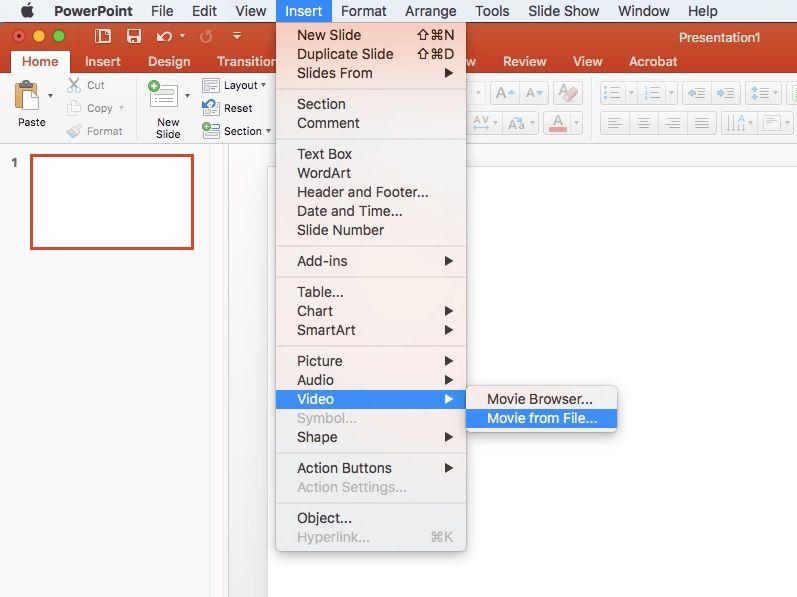
Choose the Right Video Format and File Size for Smooth Playback
Pick a codec that plays well everywhere: MP4 (H.264/AAC) is the universal choice for modern PowerPoint, while WMV can help with older Windows-only setups and MOV is handy for Mac-originated clips. Think in terms of purpose, not perfection – a crisp 720p or 1080p clip often looks better in a slide deck than a massive 4K file that stutters.
- MP4 – Best cross-platform compatibility
- WMV – Legacy Windows-friendly
- MOV – Native Mac, convert when needed
Make file size your ally: trim excess footage, use two-pass encoding, and reduce bitrate to preserve perceptual quality while shrinking bytes. For long videos or multiple clips, stream from OneDrive/SharePoint or YouTube to keep the PPTX lightweight; for offline presentations, embed locally but store the video alongside the presentation to avoid broken links.
- Compress – Aim for ~3-5 Mbps for smooth 1080p playback
- Link vs Embed – Link for streaming convenience, embed for guaranteed offline playback
- Test – Always test on the actual presentation machine

Decide Between Embedding and Linking for Reliability and Portability
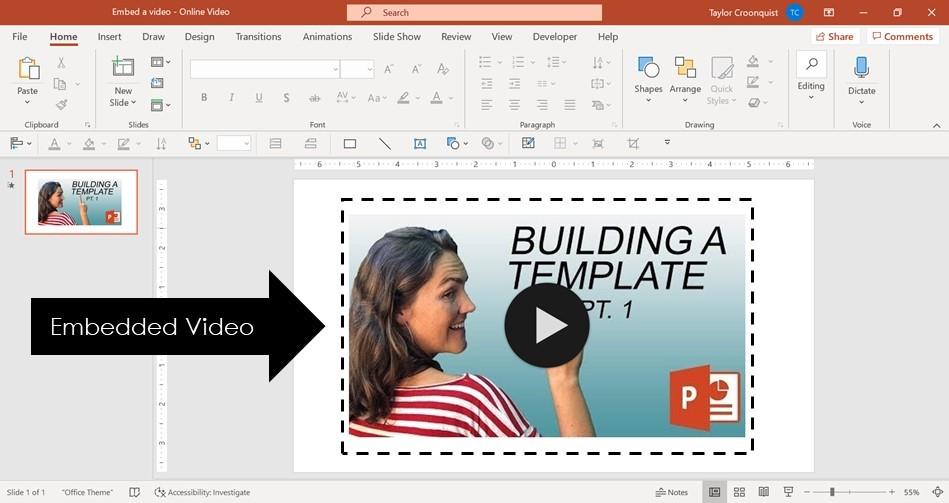
Think of embedding as tucking the video into the suitcase with your slides: playback is self-contained and offline playback is reliable, but the suitcase gets heavy – expect a much larger file size and longer upload/download times. Linking keeps the deck feather-light and ideal for collaborative or frequently updated media, yet it trades independence for dependency: broken paths or lost cloud permissions can turn your polished slide into a silent still. Weigh the travel plans, audience connectivity, and whether the final deliverable must remain intact when transferred or archived.
Make the choice practical: embed when you must guarantee playback for every viewer; link when you value portability and live updates. Use these quick checks to decide:
- Connectivity: Will you present without internet access?
- Distribution: Are you emailing the .pptx or sharing a cloud link?
- File size limits: Do recipients or platforms impose upload caps?
- Editing: Will the media need frequent updates from a central source?
| Option | Reliability | Portability | Best when |
|---|---|---|---|
| Embed | High (offline ready) | Lower (bigger file) | Handouts, offline shows |
| Link | Medium (depends on source) | High (small file) | Live updates, cloud workflows |
Insert Videos and Configure Playback Controls while Trimming and Selecting a Poster Frame
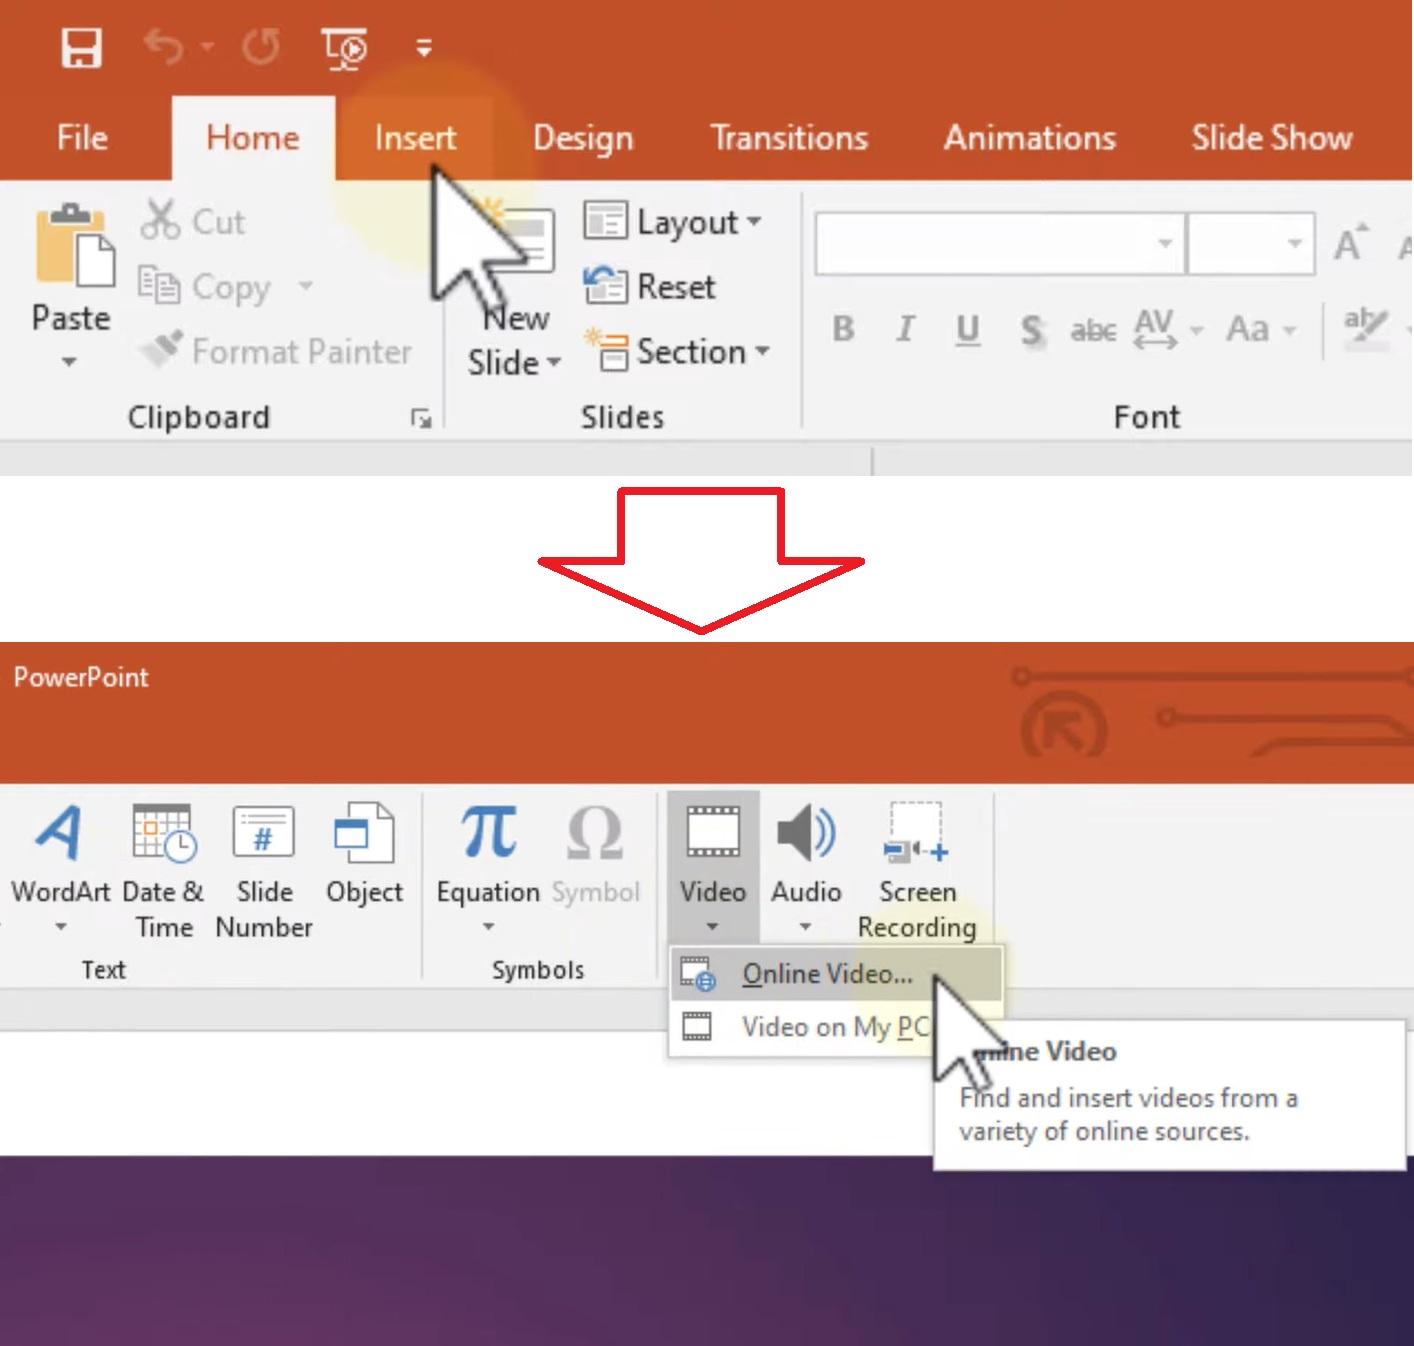
Drag your clip onto the slide or choose Insert > Video > This Device (or Online Video) to place it. With the video selected, open the Playback tab to trim and polish: click Trim Video, drag the green and red handles to set the start and end points, then Preview to confirm. Use the built-in handles to nudge frames precisely-small adjustments can transform a clumsy opening into a clean, professional start. Quick tips:
- Trim first to reduce file size and speed up playback.
- Preview after trimming to make sure transitions and audio align.
- Keep original by saving a copy before making irreversible edits.
Fine-tune how the clip behaves with playback controls: set Start to On Click or Automatically, enable Loop until Stopped, choose Rewind after Playing, toggle Play Full Screen, and adjust Volume or Hide While Not Playing. To select a poster frame (the static thumbnail shown before playback), scrub to the desired frame and use the Poster Frame option on the Playback tab-choose Current Frame or import an image with From File. Below is a quick-reference table to help you pick the best settings for common scenarios:
| Setting | Best For |
|---|---|
| On Click | Presentations with manual pacing |
| Automatically | Background loops or timed demos |
| Loop until Stopped | Trade-show displays |
| Poster Frame | Branding or clean stills before play |
Optimize Compatibility and Troubleshoot Common Playback Issues with Practical Fixes
Make sure your media and presentation sing in the same key by choosing formats and settings that PowerPoint actually loves. Start by converting videos to MP4 (H.264 video + AAC audio) and keep resolutions sensible-1080p for high-quality slides, 720p for smaller file sizes and smoother playback. Use PowerPoint’s Insert → Video → This Device to embed instead of linking when you want portability, or link intentionally if file size is a concern. Keep these quick rules handy:
- Format: MP4 (H.264/AAC) for broad compatibility.
- Sizing: Compress smartly-reduce bitrate rather than crop frames.
- Playback settings: Set Start to Automatically or On Click depending on flow.
- Version check: Newer Office versions handle modern codecs better-update when possible.
When playback stumbles-no audio, stuttering, or a mysterious black screen-trial a few practical fixes before panic sets in. Test the file in a media player, update graphics drivers and Office, and ensure all linked video files accompany the PPTX on external drives. If you need a quick diagnostic or fix, try these targeted remedies:
- No sound: Verify audio track present and not muted; check system sound settings.
- Choppy video: Lower resolution or use a performant codec; consider embedding rather than streaming.
- Black screen: Reinsert the video using Insert → Video, or convert to MP4 if originally MOV.
| Common Problem | Quick Fix |
|---|---|
| Won’t play on another PC | Embed file or include a media folder with the PPTX |
| Video lags | Lower bitrate / update GPU drivers |
| No audio | Re-encode audio to AAC |
In Conclusion
With the mechanics out of the way, the rest is intent. A video in a deck is a punctuation mark, not a paragraph-use it to clarify, not to compete. Before you present, test playback on the actual machine and display, confirm formats, and, if you’re sharing the file, compress media and check captions. If you’re linking instead of embedding, keep source files with your deck or ensure a reliable connection.
Handled thoughtfully, motion can carry what text can’t: timing, tone, and proof. Start small-trim to the moment that matters, set sensible playback options, and let your slides breathe around the clip. When the video serves the story, the slide becomes a scene, and the message lands without extra words.
Leave a Reply